How to Run a Line Blend with Colored Slips
Running line blends with colored slips is so fun! If you’ve ever had a specific color in mind, but couldn’t quite get there with a single commercial stain, blending stains might help you get close to the color you’ve been searching for. Line blending allows you to take two different colored slips and blend them in controlled ratios to create an entire spectrum of new colors.
Another reason you might want to run a line blend is to test a range of tints. I like to see a stain at full saturation (typically 15%) and then again at 12%, 9%, 6% 3% and 1%. Testing each of these increments gives me so many colors and valuable information!
Supplies Needed
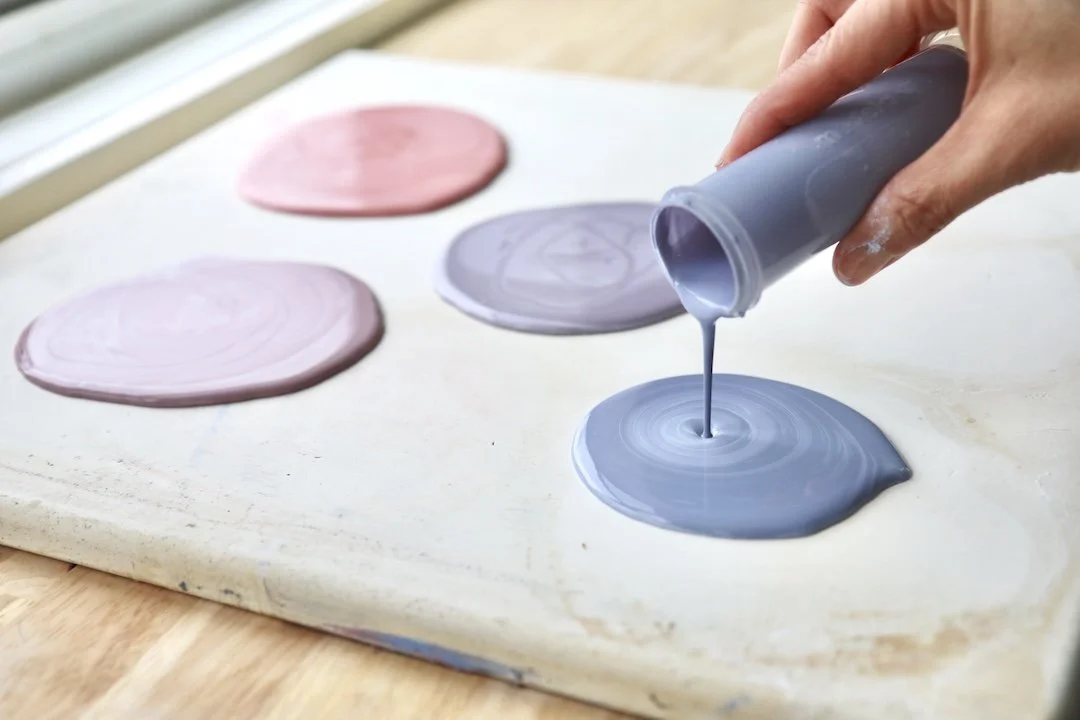
Plaster Slab
2 slips that you would like to blend (can be two colors or one color and white)
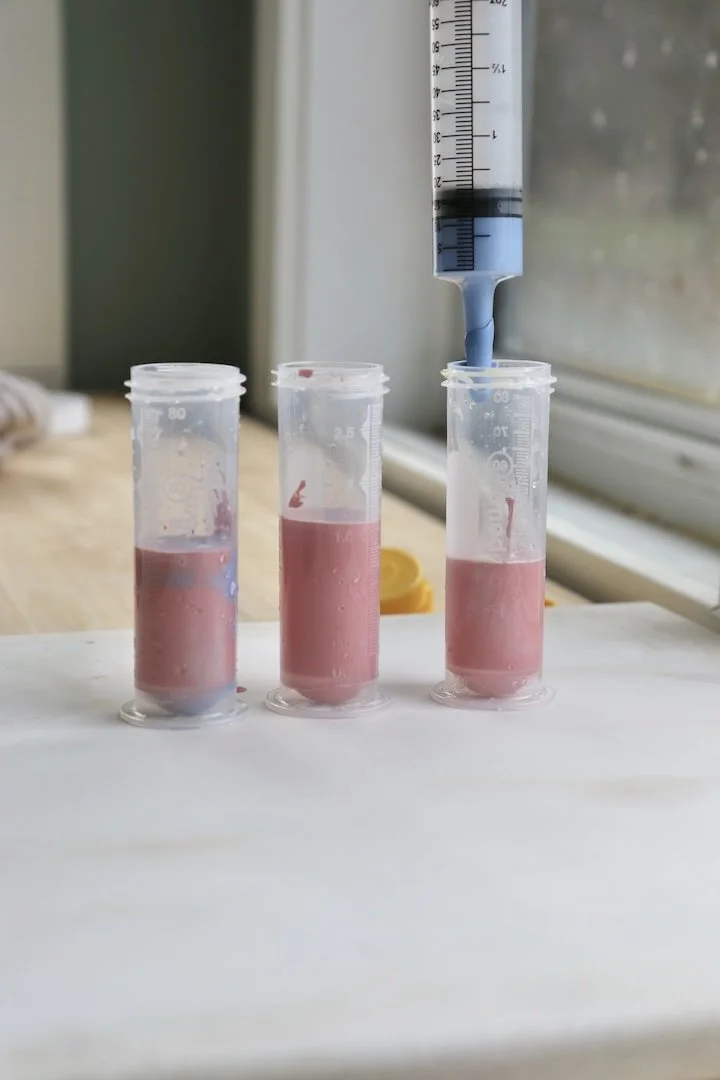
(2) 60ml syringes
Small mixing containers
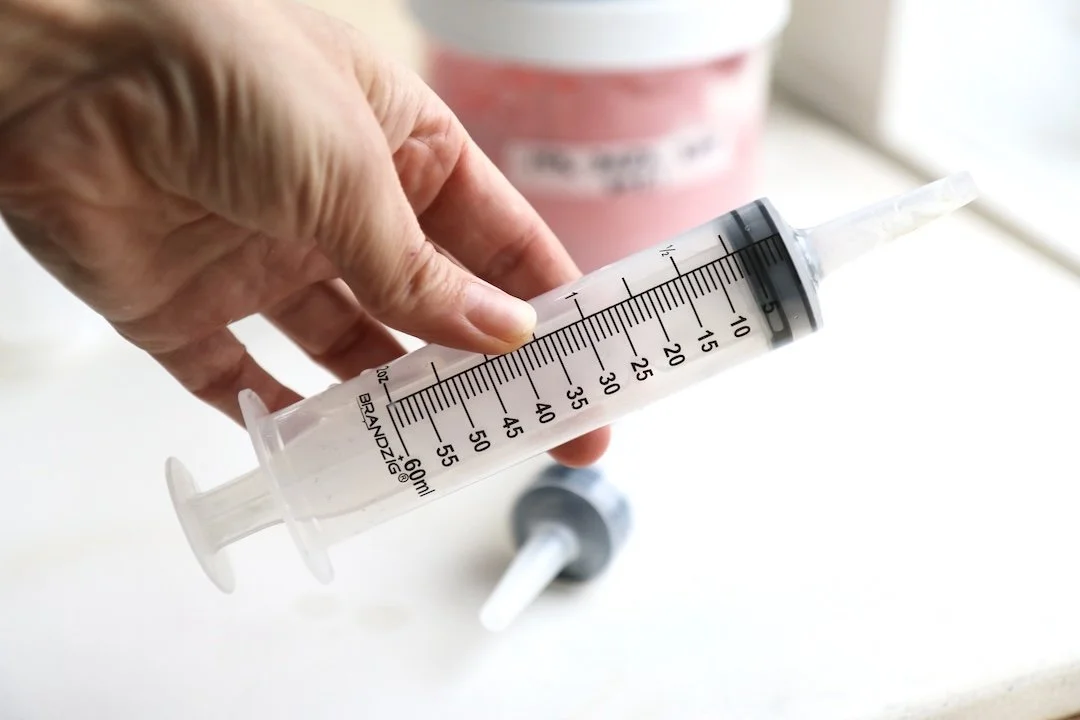
You don’t need too many things to run a line blend, but using a (ml) syringe is important. The one I use is a 60ml syringe with 1ml increments which is nice for accuracy. Unfortunately the exact one I use is no longer available, however there are plenty of other alternatives such as this 60ml syringe on Amazon.
Start with Consistent Slips
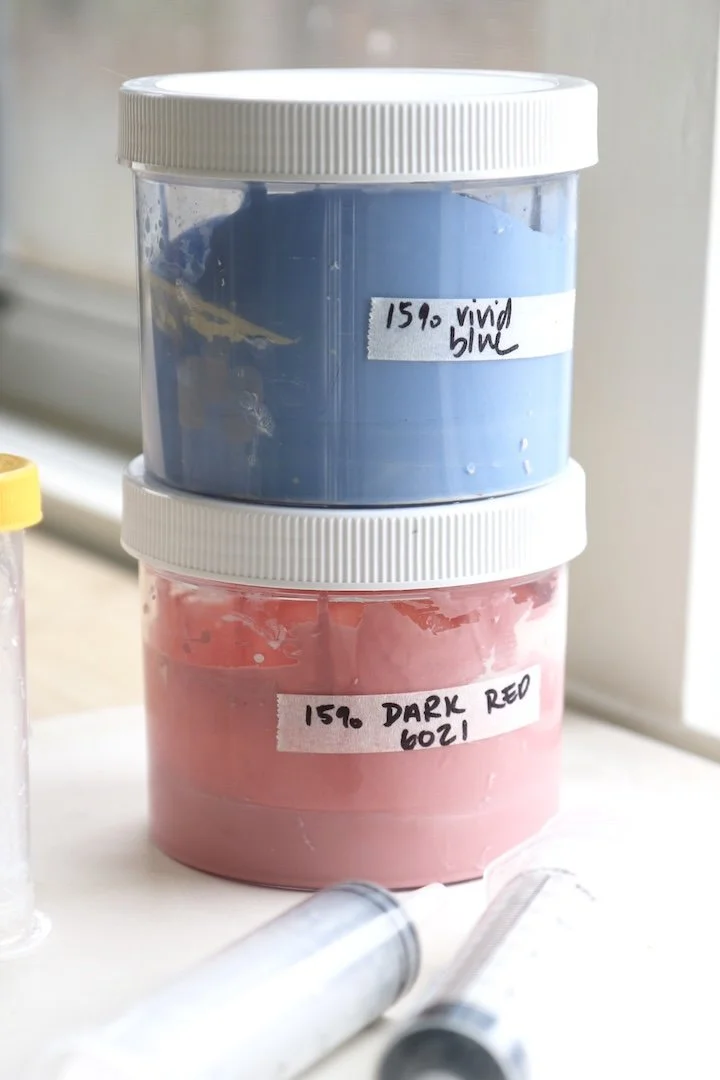
In order to get accurate results, both slips must have the same water content. This is critical. If one slip is thicker or thinner than the other, your calculations won’t be accurate. However, your slips do not need to contain the same percentage of color. I just so happen to be blending 2 slips that contain 15% color in each.
You may, for instance, want to try blend a 3% black slip and a 15% color slip ( which I highly recommend!). You can start to get tones of color by blending in black. Best Black 6600 is a much more potent stain than the rest so a lower percentage is required.
For this blend, I mixed up a 500g batch of slip of Laguna mid range porcelain #15. Each container has:
300g dry clay
200g water
0.75g darvan
45g colorant (15% of 300)
I chose to use 15% Dark Red 6021 and 15% Vivid Blue 6306 because this is a good starting point to see what the most saturated colors will look. I can then turn the saturated colors into tints and shades should I chose to in a future blend.
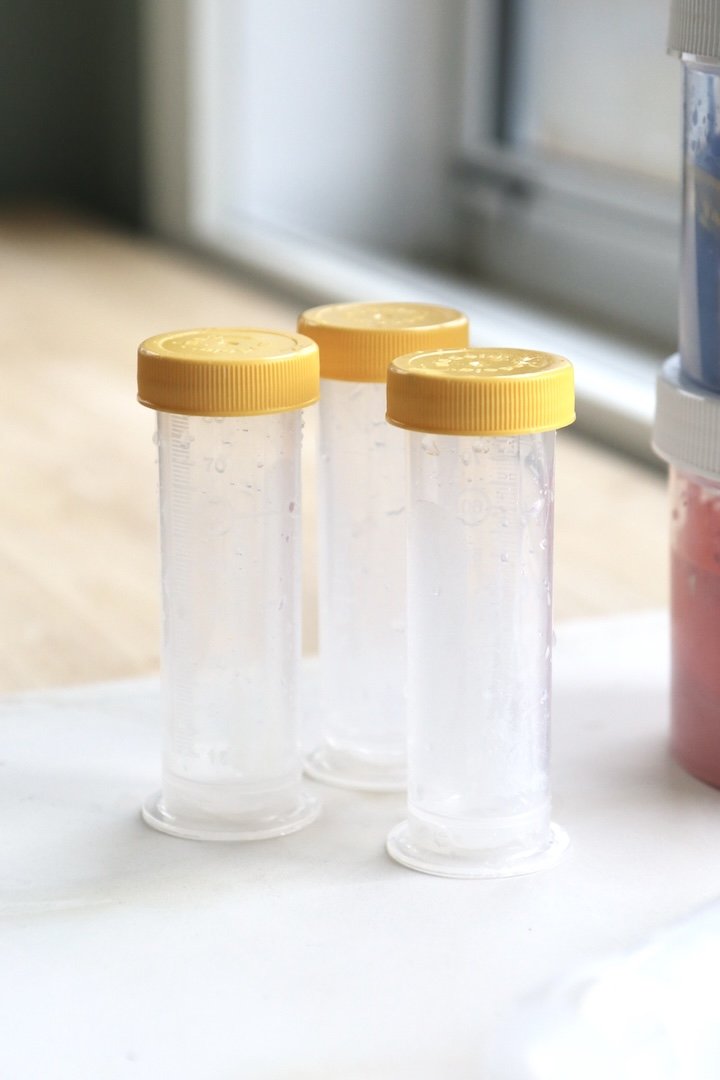
You don’t need special containers for mixing. Anything with a screw top lid will do. However, I do like these tall, narrow containers in particular because they are very easy to handle/shake. They also have ml markings on them which come in handy too. Link to containers on Amazon.
Understanding Volumetric Ratios
After mixing my slip, I blend them by volume, which means everything becomes a ratio.
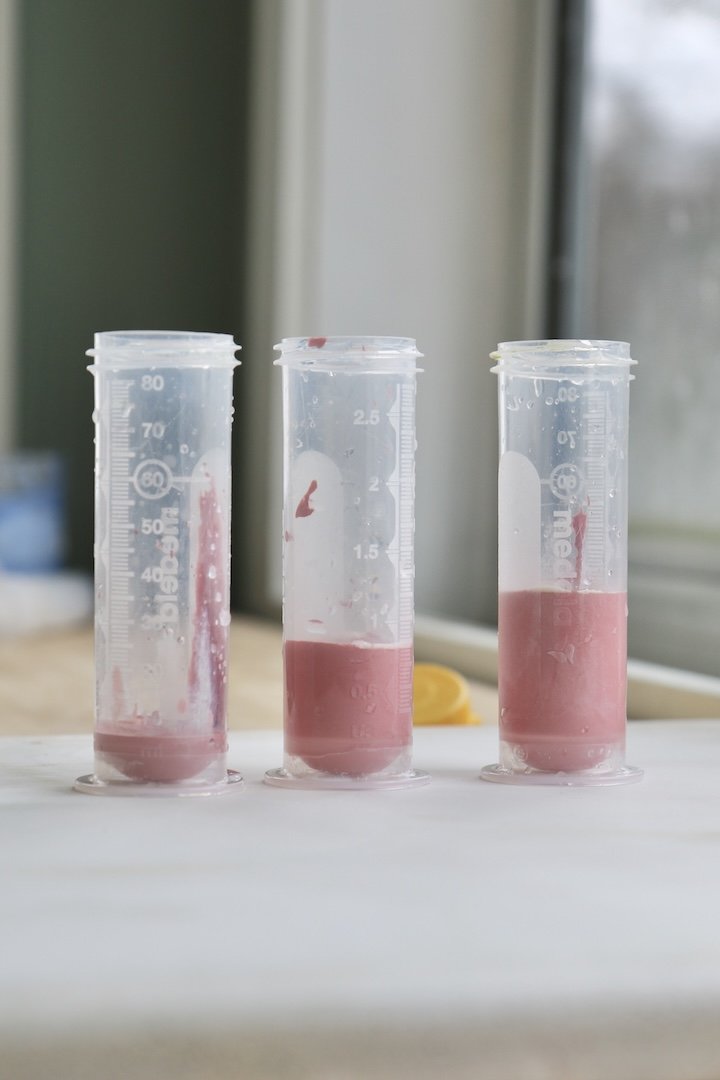
I made 50 ml samples for each blend. I found this to be a super nice sample size. It’s small enough that you don’t have to mix large amounts of slip but large enough to give you a generous size tile, which I find important. I want my tiles to be large. If you want to change the sample size, you will need to calculate your ratios.
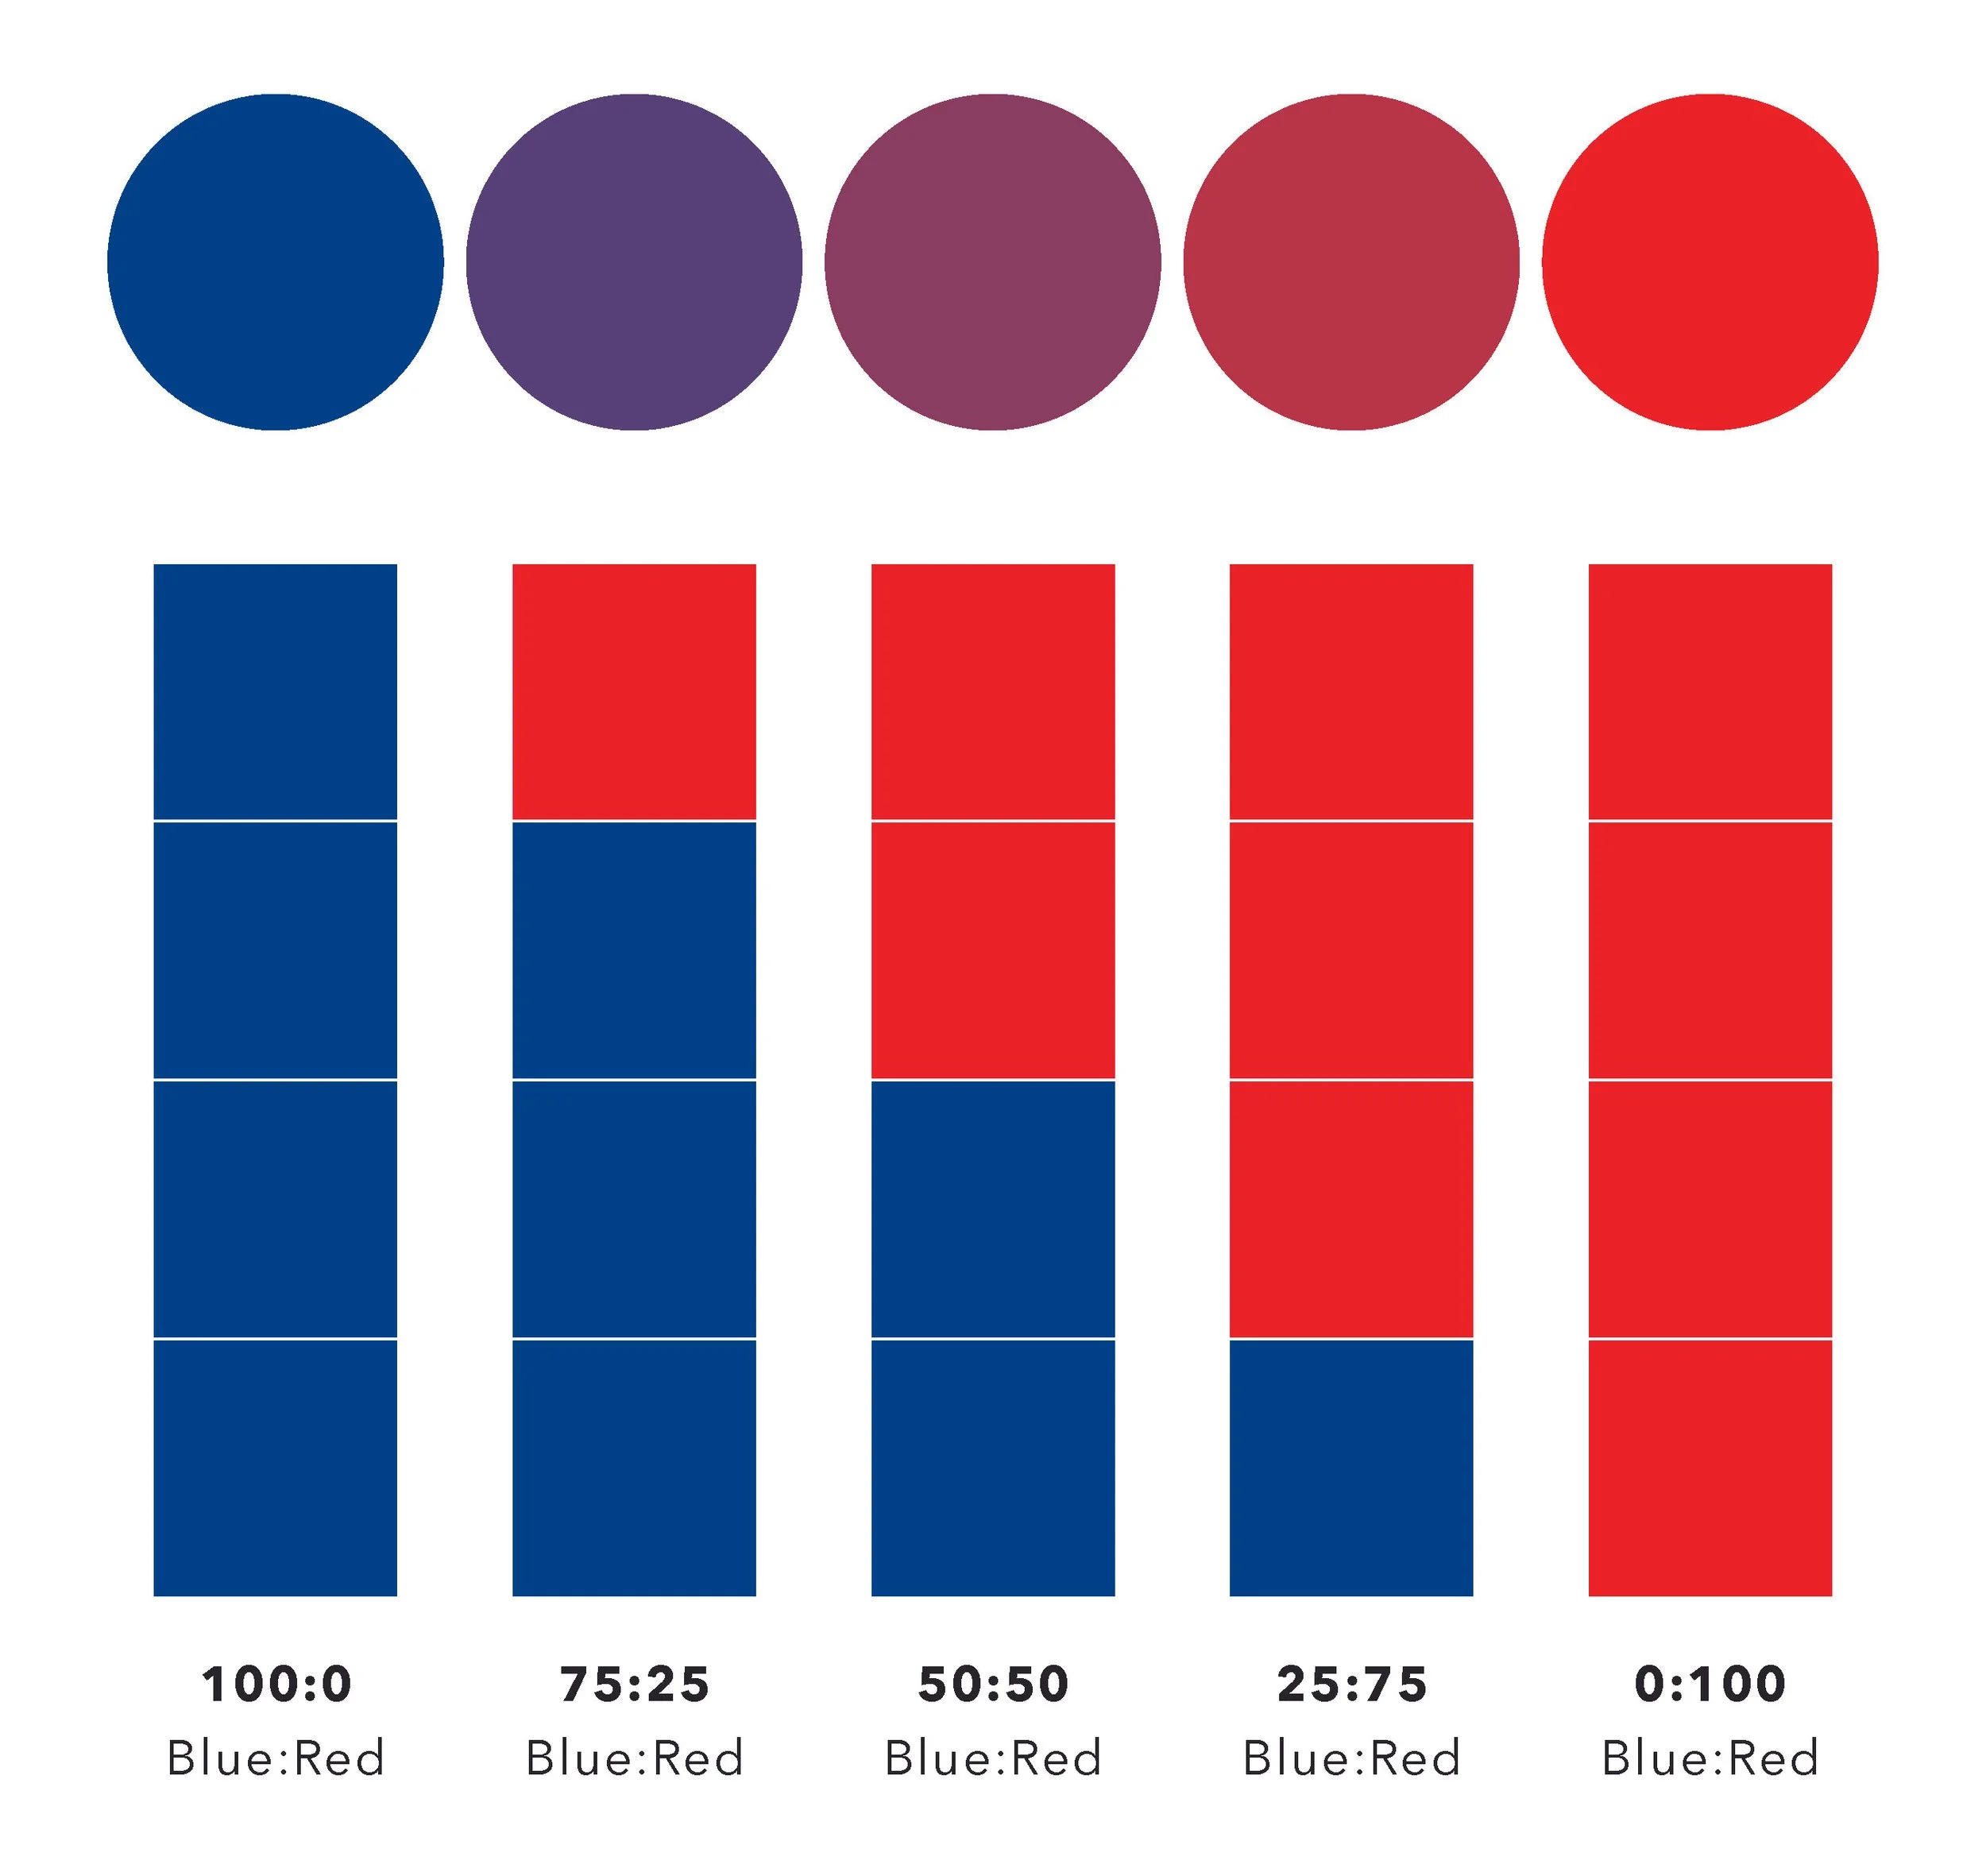
You can see the ratios I used above. This is a good starting point. You could experiment with even more steps between the two colors if you are interested. Another approach could be: 90:10, 80:20, 70:30 etc.
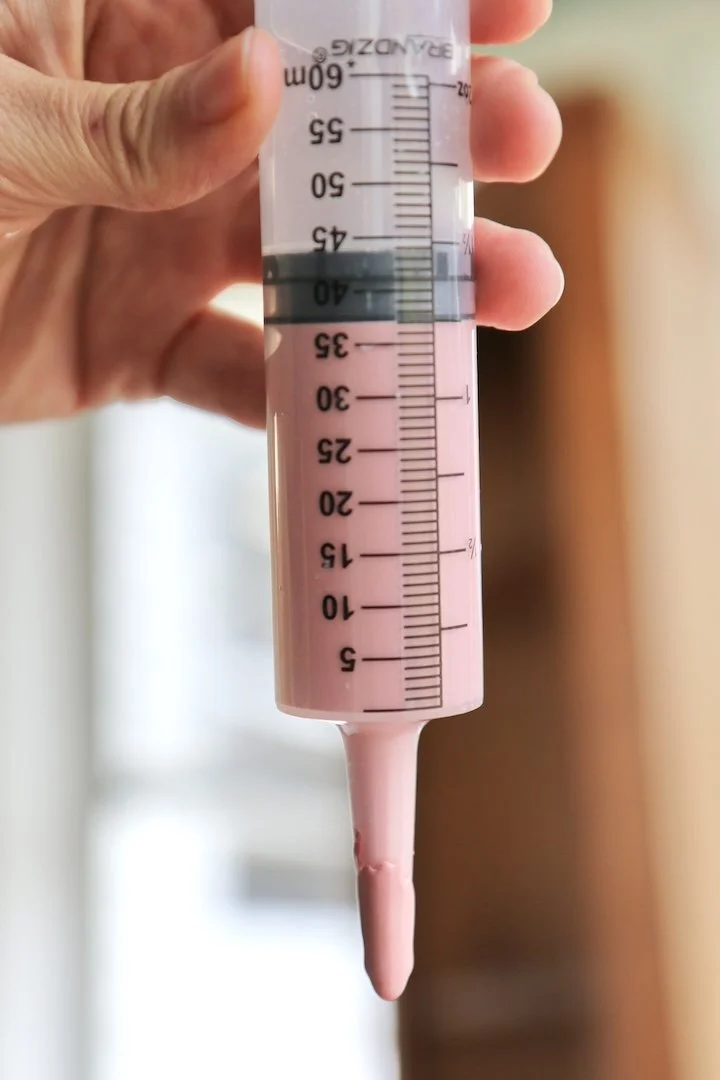
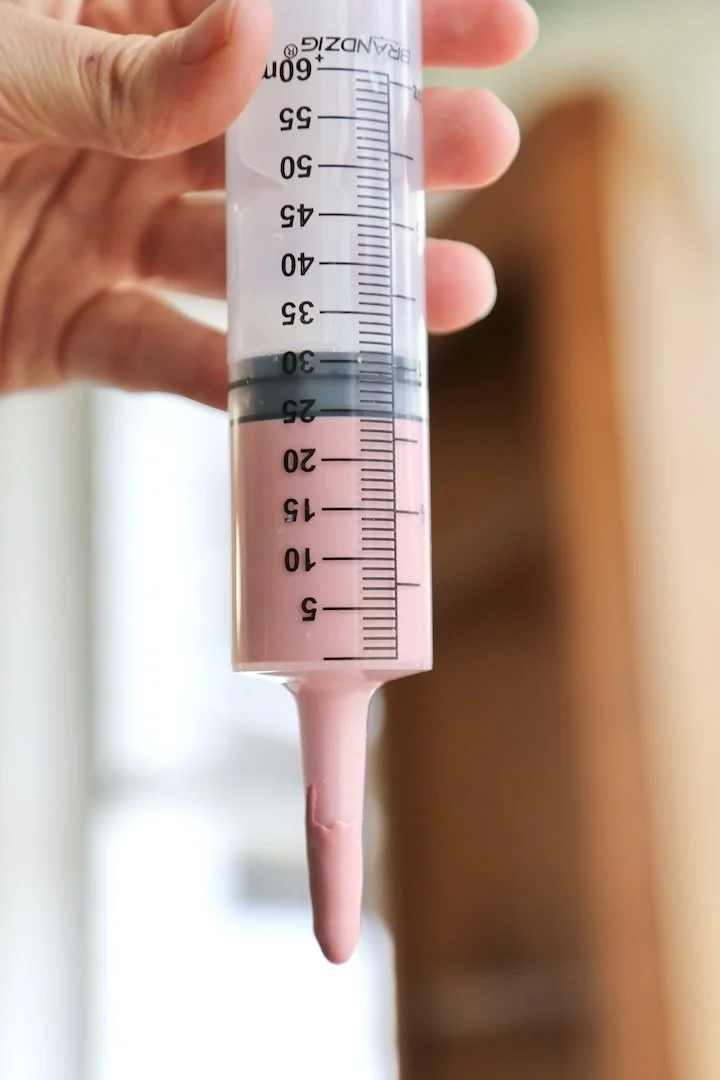
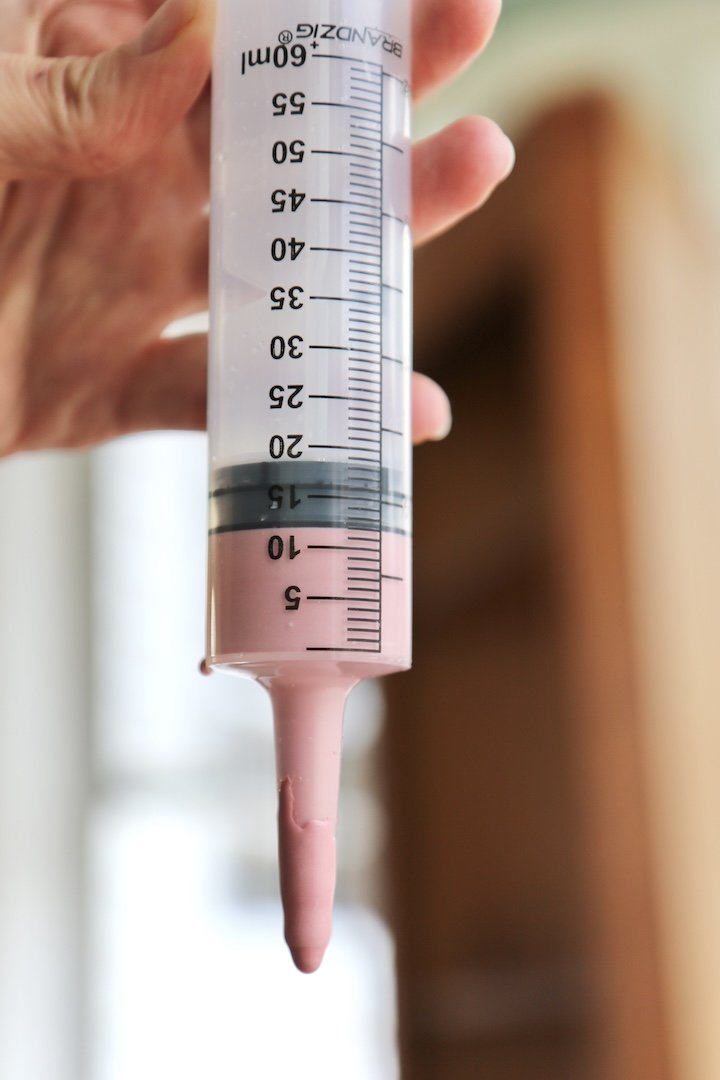
The first step isn’t really a blend so to speak (100:0). I just need a 50ml sample of the blue. For my second I need a 75/25 blend. This means 75% of Vivid Blue Slip and 25% of Dark Red Slip. To determine how many ml required, here is the math:
75% of 50 ml = 37.5 ml Vivid Blue
25% of 50 ml = 12.5 ml Dark Red
The rest of the steps follow the same logic. To make things easier, I made a chart in excel to help keep everything organized. Download the chart here.
Something you may be asking is the importance of the decimal. i.e.: Do I need to measure exactly 37.5ml? My answer is no. I don’t stress about getting everything perfect because this is not a scientifically perfect way to approach mixing colors. If you measure 37ml or 38 ml, the difference will not be noticeable.
Measure and mix
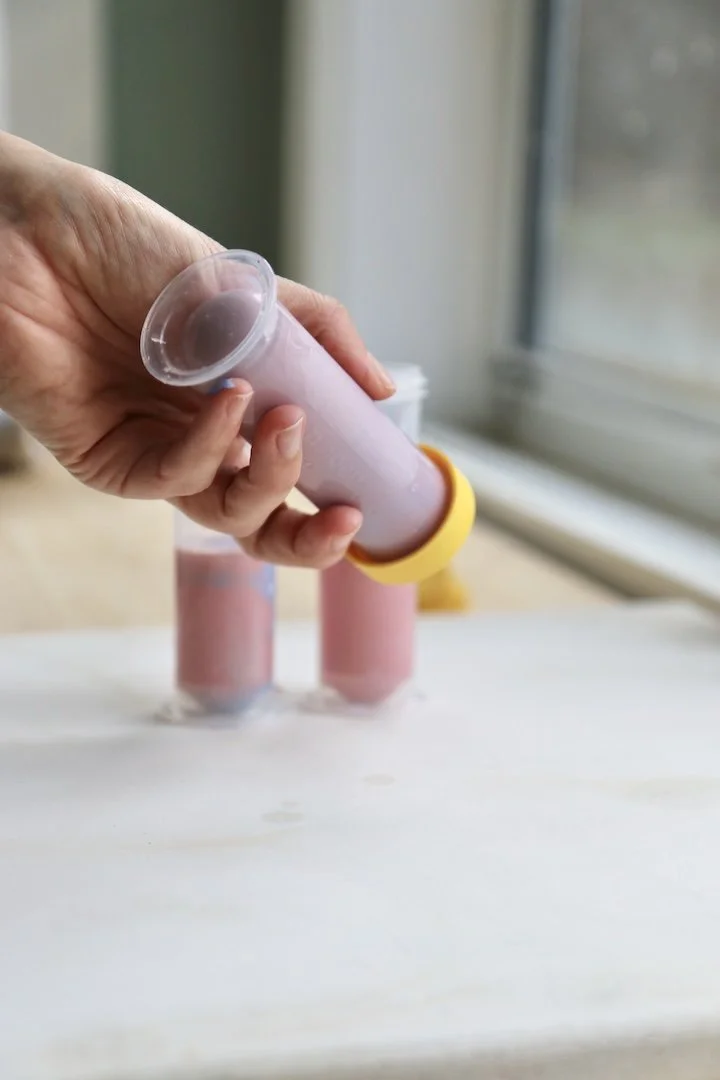
Following my chart, I measured each slip, combined them, and mix thoroughly until the color is completely homogeneous. Then I poured each sample on to a plaster slab until it sets up into clay.
How to Calculate the Final Stain Percentage
Each of our base slips contains 15% stain, but once you blend them, the amount of each stain changes.
Example: 75 / 25 Blend
You use 75% of stain that is 15% Vivid Blue.
75% × 15% (0.75 x 15) = 11.25% Vivid Blue Stain
You use 25% of stain that is 15% Dark Red.
25% × 15% (0.25 x 15) = 3.75% Dark Red Stain
Total stain percentage
11.25% Blue + 3.75% Red = 15% total stain
The total stain percentage stays the same, but the color balance changes. Again, the same mathematical logic applies to determine the rest of the tiles.
I totally get that the math can be a little overwhelming initially. But once you understand it, it really opens up the door for endless color options and it builds confidence to mix up literally any amount of any color you want. I’m including this line blend calculator to help you along in case the math isn’t clicking yet. Simply enter your stains, stain percentage and volume ratios!
Colored Clay Blend Calculator
I hope this post helped you understand the exciting concept of line blends! Its something I do frequently in my studio. Keep in mind, a line blend is not just limited to colored slips. You can absolutely use this method for blending glazes as well! The most important thing to remember is making sure the 2 materials you blend have the same dry:water content.
Send me pics of your line blends, I’d love to see what you’re working on!
Q&A
-
Unfortunately if you do not know the percentage of dry material in your slip, this method will not work. However, you can determine the dry v water content through a bit of work.
Take a small amount of your existing slip, weigh it. Then allow it to dry completely. Weigh the dry contents. You can determine the dry to wet percentage using this data.
-
Yes, bone dry scraps are what I am referring to. It can also be powder.
-
Darvan 7
-
For a casting slip a good starting point is 0.25% of the dry weight. For a brushing slip, I just put the tiniest splash in.
-
The only way evaporation becomes a factor is if you leave your container uncovered for extended periods of time. When you make a large bucket of slip in a 5 gallon bucket with a cover that seals, your water content will remain the same.